Have you ever made a card that makes someone say WOW when they open it? 💕
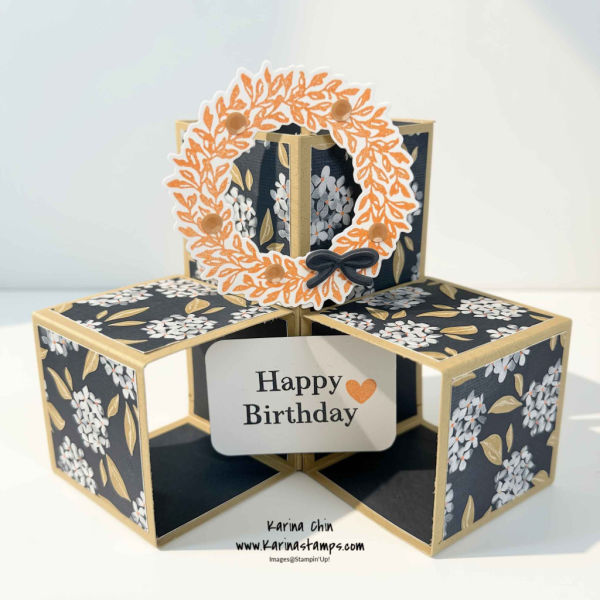
Today, I’m sharing a fun Pop-Up Cube Card featuring the Cottage Kindness Stamp Set from Stampin’ Up!
If you love fancy fold cards, interactive designs, and learning new card-making techniques, you’re going to love this project!
The best part about making handmade cards is creating something special that brings a smile to someone’s face. This Pop-Up Cube Card does just that!
A Fun Fold Card with a WOW Factor!
I love finding new ways to make handmade cards extra special, and this Pop-Up Cube Card is such a fun design!
What makes this card unique is its dimensional cube shape. It’s a wonderful way to add a little surprise to your handmade greetings.
For today’s project, I’m featuring the Cottage Kindness Stamp Set, which is perfect for adding a charming, heartfelt touch to your paper crafting projects.
Whether you’re an experienced stamper or just getting started with card making, learning a new fancy fold is always fun!
Watch My Pop-Up Cube Card Video Tutorial
Want to learn how to make this card?
I’ve created a step-by-step YouTube tutorial to show you how to put this fun fold card together.
In the video, I’ll walk you through the process of creating this Pop-Up Cube Card and share helpful tips along the way.
You can follow along and create your own version using your favourite Stampin’ Up! stamps, cardstock, and Designer Series Paper.
Make It Your Own!
One of my favourite things about fancy fold cards is how easily you can customize them!
Try changing the colours, patterned papers, and stamped images to create something completely different.
You can use this Pop-Up Cube Card design for birthdays, thank-you cards, friendship cards, or just because!
Once you’ve learned the technique, the creative possibilities are endless.
Here’s the measurments for the Card Base: 8-1/4″ x 8″ scored at 2″, 4″, 6″ and 8″ with the longer side at the top of the trimmer. Turn counterclockwise and cut at 2″ and then 2″ again.
Shop Stampin’ Up! with Me & Receive a FREE Gift!
💕 Love the products featured in today’s project?
You can purchase your Stampin’ Up! supplies through my online store.
🛍️ SHOP HERE: https://karinachin.stampinup.net/
🎁 FREE 17-Project PDF Tutorial!
When you place an order of over $65 CAD through my Stampin’ Up! online store, you’ll receive a FREE 17-project PDF tutorial filled with more card-making inspiration!
It’s my way of saying THANK YOU for shopping with me and supporting my small business.
Let’s Stay Connected!
Looking for more handmade card ideas, fun fold tutorials, and Stampin’ Up! inspiration?
I’d love for you to join my crafting community!
💕 YouTube: https://www.youtube.com/@karinastamps
💕 Facebook: https://www.facebook.com/Karinastamps
💕 Instagram: https://www.instagram.com/stampwithkarina/
💕 Pinterest: https://ca.pinterest.com/karinastamps/
💕 Shop Stampin’ Up!: https://karinachin.stampinup.net/
💌 Join My Email List!
Visit https://www.karinastamps.com/ and subscribe using the sign-up form on the side of the page to receive card-making inspiration, class information, and Stampin’ Up! updates. Thanks for stopping by!